Bookshelves
Created/Modified: 2014-07-26/2014-07-26
I've long been dissatisfied with the state of the bookshelf art, and took it upon myself to prototype a new approach, with the constraints:
- the shelves should look reasonably good
- be absolutely minimal in their design
- not require fine carpentry skills
- not touch the ground
The latter constraint came about for a variety of reasons. The floor in my place is carpet and vacuuming is a big enough pain without the bottoms of bookshelves to work with. And in any case I just thought it would be cool for the selves to hang from the walls and ceilings. I spent some quality time with wood engineering literature and was able to demonstrate that the loads I was looking at were comfortably within tolerances, including the pull-out strengths of eyebolts into the ceiling joists from places like the US federal government.
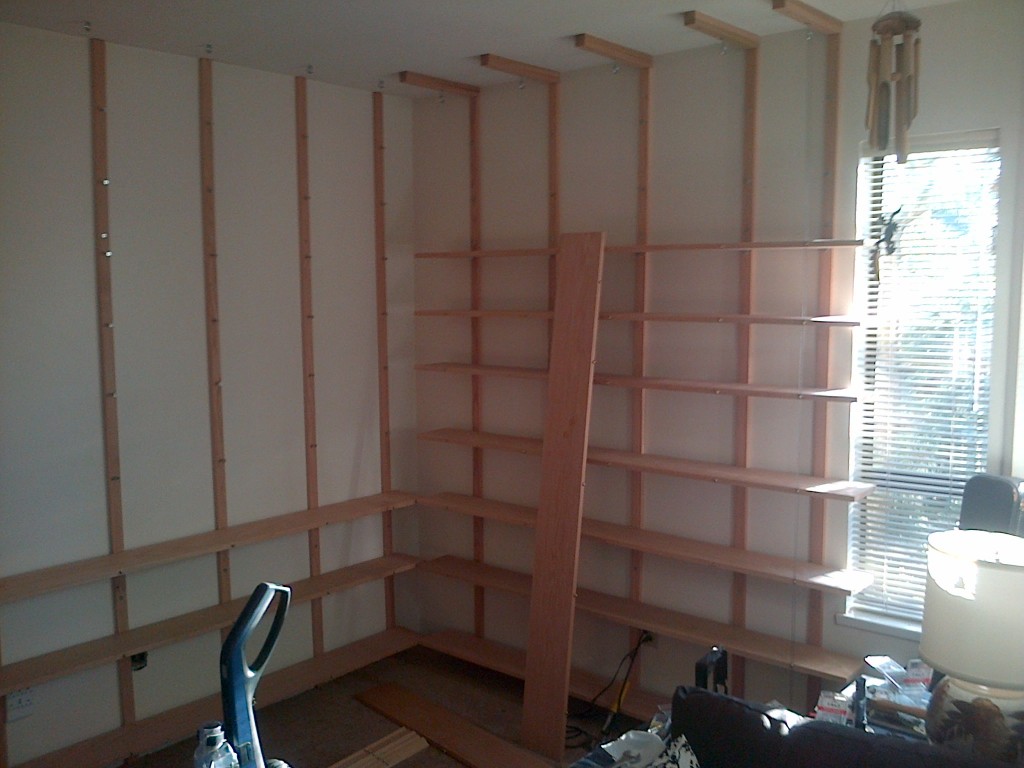
The design is as follows: vertical maple 1x2 stringers screwed to the studs by four 1/4x3 inch steel flathead screws would carry nine rows of additional 1/4x3 screws with their heads sticking out an inch to carry the back of the shelves. The front of the shelves would be carried by 3/32 wire strung from eyebolts in the joists or in 2x2 maple headers along the wall that was parallel to the joists. These can be seen in the picture below:

The ceiling joists run parallel to the wall on the right, and the shelves are 1x8 maple, 6 ft long, so while the first joist is about 14 inches from the wall the eyebolts need to be about 9 inches out (because the 8 inch planks are stood off by the thickness of the 1x2 stringers up the wall--I'm giving unfinished dimensions because I'm lazy, so take off 1/4 here or there as appropriate.) The headers sit on top of the stringers at the back and are screwed into the joists with 1/4x3 inch flathead steel screws. I couldn't find any 2x2 maple so used a sandwich of two 1x2 pieces, which is sub-optimal but workable. I probably should have glued them together but didn't really need the extra strength so didn't bother. You can't see them in the finished project anyway.

There were a lot of screws in this project. Five stringers on each wall with four screws to hold them on and nine screws to hold the shelves plus five more to hold the headers up adds up to 135 1/4x3 screws. Then there were another 90 number 8 1 1/4 inch brass round head screws for the front of the shelves, plus flat steel washers for each of them. I would have used steel screws for the shelf fronts if I were doing this again, as the brass was prone to breaking in the hard maple, even with fairly generous pilot holes. [EDIT: I've decided to replace all the brass screws with steel ones: the brass just aren't strong enough to give the kind of friction I want on the wires, and a few of the shelves are already starting to show a little bit of slide on the wires as the wood beneath them compresses. I may have to add clamps to the wires under the shelves, ultimately, to get a really secure configuration.][EDIT: 2014-12-27, after six months nothing has shifted so I'm pretty happy with the design as-is.]
As can be seen in the picture above, I clamped and marked the shelves and then drilled and screwed the brass screws in most of the way. This made actually setting the shelves up fairly easy.
The back of the shelves rests on screws set out of the stringers, remember. To seat the shelves properly I would place a shelf up by hand, using a vertical level on the end to line it up side-to-side with the shelf below (the bottom shelf was just eyeballed into place). I would then use a large hammer (with woodblock, of course) to bang the shelf down on the screw heads.

This would mark the positions of the heads, and a quick zap with a counter-sink bit would create a divot that the edge of the head would rest in. It worked fairly well, and the design was as forgiving of my rather cavalier approach to carpentry as I'd hoped.
Putting the shelves up can be done by one person. I worked from the bottom up, marking and drilling each shelf as I went. I had strung the outermost wires over the eyebolts and simply rested the back of the shelf on the screws, making sure the heads fell into the divots I had made, and then adjusted the front using a level. The bottom shelves I put a bend in the wire to get the height right (having cut the wires a few inches too long for the purpose, to be trimmed later) and found that the 3/32 braided steel wire--which I ordered from someone off Amazon--was more than stiff and strong enough to hold a single shelf with just a hook bent in the end. That made it easy to fiddle with one end while the wire held up the other, and drive the screw in with my trusty old plug-in drill (the wireless drill just didn't have enough umph to drive things into the maple.)
The bottom shelves took some readjusting after everything else was up, but overall the process of putting them up wasn't too difficult.
After getting all the shelves up with the outermost wires only, I strung the inner wires, cut them more-or-less to length, and proceeded to work from the top down to press them in behind the washers. It is strictly friction that is keeping the front of the shelves suspended. I had thought about wrapping the wires around the screws, but the wire is too big and the screws too small, and it would have made tensioning very difficult (it was already a bit tricky). This is the weakest aspect of the engineering, but the shelves show every indication of being strong and stable. Fully loaded I can pull down on them with a good fraction of my body weight and they don't so much as quiver.
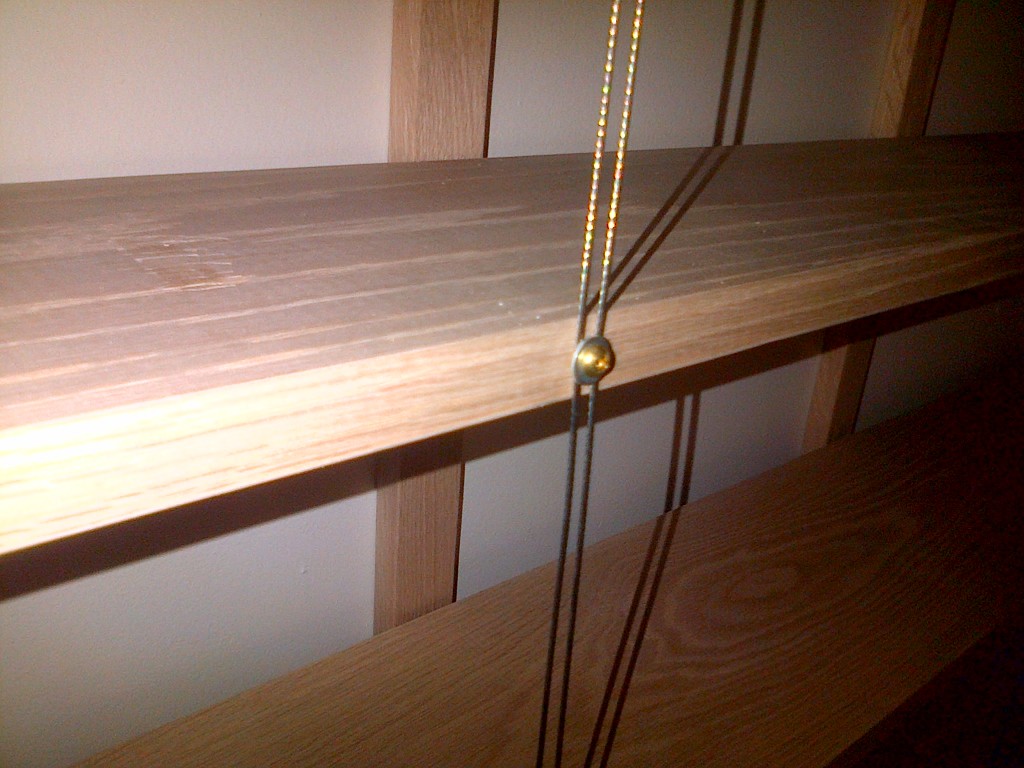
The wires run down on either side of the screws, as show in the picture below.
And the wall takes most of the load via the screws in the stringers (which in fact are long enough to get into the studs underneath):
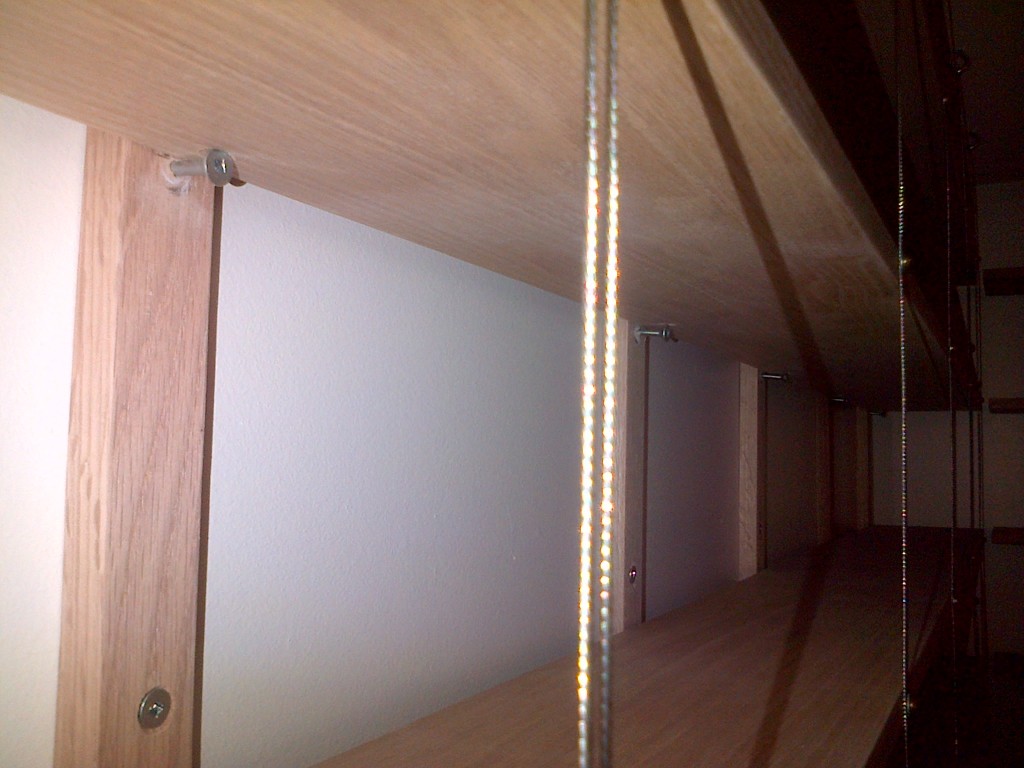
One nice aspect of the design is there is a bit of room behind to let air circulate. Gotta keep those books well-ventilated!
It's difficult to see in this picture because I took it before I added them, but I also ran single wires down the butt-ends of the shelves. These act as bookends for all except the top shelf. On two ends I ran them down in a zig-zag pattern and on the other two they are simply vertical. I think I like the zig-zag more.
During this whole process I was fiddling with the tension on the wires (and replacing brass screws whose heads had come off... I mostly just drilled a new pilot hole adjacent and more-or-less covered the snapped end of the old screw with the washer.) The tensioning is not hugely critical so long as things are pretty even. I retensioned a bit after loading. YMMV. The bottom shelf wires will always be a bit loose until the system is loaded with books. I did stand on the bottom shelf at times with my full weight to get a sense of what was required, but mostly just aimed for equal distribution of force. The wire ends sometimes became bit frayed but nothing unmanagable. The wire could be cut with a decent set of pliers.
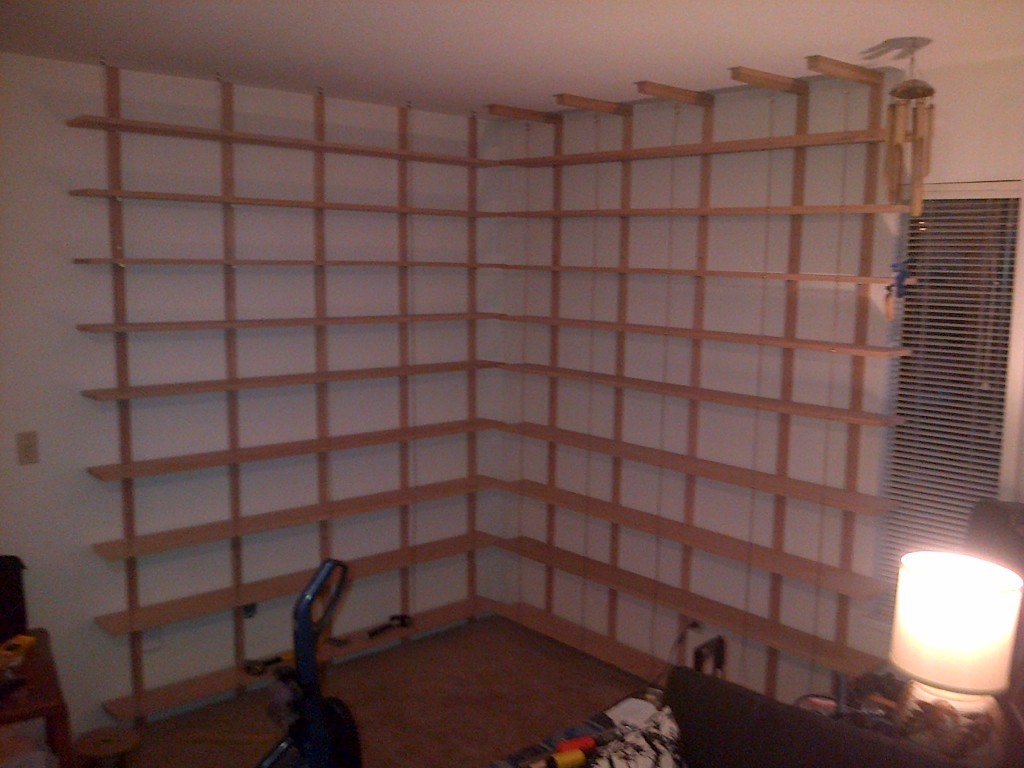
The proof of the shelving is in the loading, and I gradually built up the load on these ones over the course of week or so, just to make sure there would be no surprises. There weren't (yet):

That's most of my books (which is about half of the total before my big move two years ago). There is actually a little room to spare, which is nice. Even though I'm reading mostly ebooks these days, some extra room is always valuable. I'll likely get rid of some of the older less interesting ones soon to make even more space.
So the design goals have been met, including the minimal waste condition. Three are a few dozen screws left over, and not a lot of additional scrap:

The wire was only available in something like a 250 foot roll, so I had to accept that waste, but the wood came out just about perfectly.
Overall, a successful prototype, and I would definitely build this design again. Although it's nominally built-in, I will take it down and fill all the screw-holes when I move out of this place and expect to get my full damage deposit back.